






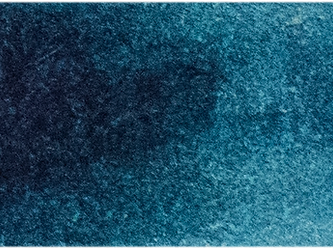

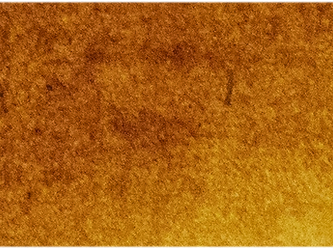



A transparent passage can give an oil painting its inner light; an opaque passage can establish form with decisive authority. This oil paint transparency guide is designed to help you recognise the difference before it becomes an accident on the canvas. Transparency is not a mark of quality, nor is opacity a limitation. They are distinct material properties, and each gives the painter a different kind of control.
The useful question is not, ‘Which is better?’ It is, ‘What must this layer do?’ A glaze over a dry underpainting needs light to travel through the paint film and return from the layer beneath. A painted highlight may need to cover what is below cleanly, with minimal interference. Once you can anticipate that behaviour, colour selection becomes more deliberate and mixing becomes less wasteful.
Oil paint transparency guide: what the terms mean
A transparent oil colour permits a substantial amount of light to pass through its paint film. Light reaches the ground or underlying paint, reflects back through the colour, and creates optical depth. A thin layer of Transparent Oxide Red over a pale ground, for example, can appear rich and luminous precisely because the light is interacting with more than the surface of the paint.
An opaque colour scatters or blocks more light. It conceals the layer beneath it more readily and tends to present its colour at the surface. Titanium White, Cadmium colours and many earth colours can be especially useful where a painter wants a direct, solid statement of colour or needs to correct a passage without repeated applications.
Between these two characteristics sits semi-transparency. Many colours are neither wholly transparent nor wholly opaque in practical use. They may cover well in a fuller application but become translucent when spread thinly with a brush or painting medium. Treat transparency as a spectrum, not a fixed binary.
Paint makers commonly indicate transparency, semi-transparency, semi-opacity or opacity on colour charts and tube labels. These markings are valuable starting points, but they describe the inherent tendency of the colour rather than a guarantee of how every brushstroke will look. Film thickness, ground colour, medium, brushwork and the colours beneath all affect the result.
Why pigment matters more than the colour name
A colour name can suggest appearance, but the pigment tells you more about behaviour. Two paints called Yellow Ochre may differ in undertone, tinting strength and handling if they use different pigment compositions. A single-pigment colour gives the painter a particularly clear view of its character: how it covers, whether it makes a clean glaze, and how it changes a mixture.
Organic pigments often offer high chroma and transparency, though there are exceptions. Quinacridone, phthalocyanine and perylene pigments are frequently valued for their transparent depth. Inorganic pigments can be more opaque, particularly when their particles scatter light strongly. Yet this is not a rule to apply blindly. Pigment particle size, refractive index and the formulation itself all contribute to the paint film’s appearance.
This is why a proper swatch matters. Spread a little colour thinly over a black-and-white stripe, then allow it to dry. The black portion reveals how readily the paint permits the dark below to remain visible; the white portion helps you judge its body colour and undertone. Make the swatch with the paint unmodified first. Then repeat it with the medium you normally use. The difference can be revealing.
High pigment load deserves a little care in interpretation. It gives the painter access to a more concentrated, responsive colour, but it does not turn an opaque pigment transparent. Adding a great deal of medium may make an opaque paint layer thinner and more translucent, yet it will not give it the optical clarity of a naturally transparent pigment. Use the material’s native character rather than trying to force it into another role.
Glazing: depth without cloudiness
Glazing is the application of a thin, transparent or semi-transparent layer over a thoroughly dry layer. It is most effective when the glaze has a clear purpose: warming a flesh shadow, deepening a blue distance, unifying a passage, or altering value without rebuilding every form.
For a glaze to remain luminous, keep the layer lean in paint and physically thin, rather than simply flooding it with medium. Too much medium can make handling difficult and can create a glossy, slippery surface that is not always appropriate to the painting. Choose a suitable oil painting medium according to the working qualities you need, and observe sound layer construction: later layers should generally remain at least as flexible and oil-rich as those beneath.
A transparent pigment is not automatically suitable for every glaze. A very intense transparent blue or green can shift a passage much more quickly than expected. Start with less paint than you think necessary, brush it out evenly, then assess it after the surface has settled. Several restrained glazes usually give more depth than one heavy, dark layer.
Transparent colours are also useful in passages that are not traditional glazes. They can be dragged thinly into wet paint, laid over a textured ground, or allowed to remain broken across the weave of a canvas. In each case, the visibility of the layer beneath is part of the effect.
Opacity is essential, not a compromise
Opaque colours earn their place whenever coverage, clarity or decisive value structure is needed. An opaque light colour can establish the architecture of a painting early. Opaque yellows and reds can retain their presence when placed over dark passages. White, used with judgement, allows the painter to alter value and temperature in mixtures without relying on repeated transparent layers.
Opacity is equally valuable in revision. If a drawing has shifted, or a form needs to be brought forward, an opaque mixture can re-establish the passage quickly. Transparent paint over a confused underlayer may only make the confusion more visible.
Scumbling makes particularly good use of opacity. Here, a relatively dry, broken layer of lighter opaque or semi-opaque paint is brushed over a darker, dry surface, allowing portions beneath to show through. Unlike a glaze, which deepens through transmitted light, a scumble catches light at the surface. The two techniques can sit beautifully together: transparent shadows and colour transitions beneath, with scumbled light describing atmosphere or texture above.
Mixing transparency and avoiding mud
When you mix colours, the transparency of the resulting mixture may change substantially. Combining two transparent pigments does not always produce a transparent-looking mixture, especially when the hues are near complements. Their different absorption characteristics can reduce chroma and create a darker, denser film. This may be exactly what you need for a shadow, but it is worth predicting rather than discovering halfway through a painting.
Adding white is one of the quickest ways to increase opacity and shift the character of a colour. It also alters temperature, value and chroma. A transparent lake red may make a convincing rose glaze on its own, but mixed with white it becomes a more opaque pink with a different visual role. Neither version is more correct. The decision rests on whether you want the underpainting to participate in the final colour.
Avoid treating black as a simple darkening agent in transparent mixtures. Some blacks are highly covering and can collapse the light in a glaze or turn a clear mixture dull. For deep transparent darks, try building value through transparent complements or a controlled mixture of transparent dark pigments. Test these mixtures over the same ground and underpainting colours used in the work itself.
Build a transparency reference for your palette
A personal reference panel is more useful than memorising symbols. Prepare it on the primed surface you use most often, because a warm oil ground, a white acrylic ground and a toned panel each affect colour differently. Paint every palette colour across a black-and-white stripe, first straight from the tube and then in a thin application with your usual medium.
Record the pigment code, the date, and any observations about drying, gloss and brush handling. Add a second row of mixtures you rely on often, such as an earth-and-blue neutral or your preferred flesh half-tones. Over time, this becomes a working document: not a theoretical chart, but evidence of how your own materials perform together.
At Michael Harding, colour information is best used as an invitation to test, compare and make informed decisions in the studio. Tube markings and pigment details give you a reliable starting point; your ground, medium and method complete the picture.
The next time a passage appears flat, do not automatically reach for more paint. Ask whether the painting needs a covering statement, a broken veil of light, or a transparent layer that lets the earlier work continue to speak. That small material decision can change the whole surface.